MOBILAIR M 57 portable compressor
Short instructions for operation and maintenance
The operating videos and short instructions presented in this page are for supplementary references only.
The operating and handling instructions as laid down in the KAESER operating manuals remain in full force and effect. When applying the operating instructions presented in this page full compliance with all national safety and environmental regulations is mandatory.
The operating videos and short instructions presented in this page are copyright protected intellectual property of KAESER Kompressoren SE. The Unlawful use of the materials from the page, e.g. reproduction, distribution, communication to the public or making available to the public is solely permitted with the prior written consent of the proprietor. Any copyright violation may result in civil and criminal penalties.
- Open the right-hand access door.
- Switch on the «Controller ON» switch.
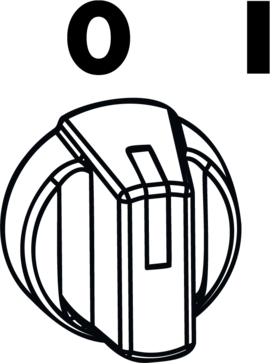
- Close the door.
- Turn the «starter switch» to "ON"
- The charging indicator lamp must light.
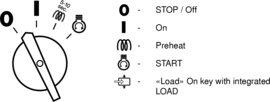
Engine pre-heating
The preheating period should be between 5 and a maximum of 10 seconds depending on ambient temperature. Low ambient temperatures require a longer preheating period.
The electric fuel pump starts automatically during pre-heating. This vents the fuel line before each start.
- NOTICE!
Destruction of the glow plug
Excessive pre-heating can cause severe damage to the glow plug
- Never allow the glow plugs to operate for longer than 10 seconds. - Turn the «starter switch» to the “Pre-heat” position and hold for 8 to 10 seconds
The engine's glow plugs are energised and the engine pre-heated.
Starting the machine
- NOTICE!
Destruction of the starter!
Improper operation could destroy the starter.
- As long as the engine is running, do not actuate the starter switch.
- Do not turn and hold the starter switch for longer than 30 seconds.
- Wait for a few minutes after each attempt to start the engine.
- The starter switch must be returned to the neutral position before each start attempt (restart protection). - Turn the «starter switch» to "START" and release it as soon as the engine starts.
The charging indicator lamp extinguishes as soon as the engine is running.
To avoid unnecessary wear, the engine should be run in IDLE until the airend discharge temperature reaches +30 °C. The airend discharge temperature is shown at the remote thermometer contact on the instrument panel.
Switching to LOAD
The airend discharge temperature must be at least +30 °C.
- WARNING!
Compressed air can cause serious injuries
- Never direct compressed air at persons or animals.
- Make sure that no one is working on the machine.
- Ensure that all panels are in place.
- Ensure that all machine doors are closed. - Press the «Load On» button.
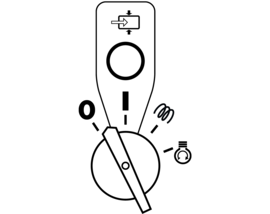
- Turn the «starter switch» to the "STOP/Aus" position.
The engine turns off.
- Open the right-hand access door.
- Switch off the «Controller».
- Close the door.
- Check fuel tank level and top up if necessary.
- Engine is not getting any air, therefore check the air filter.
- Engine starter does not turn, please charge the battery.
- Check whether the bonnets and doors of the system are closed during operation.
- Check the installation conditions such as distance to walls or similar.
- Check fluid levels (compressor oil, engine coolant).
- Clean the radiator.
- If necessary, disable the tool lubricant.
- Check compressor oil level for overfilling.
- Apply correct switch-off procedure, unload machine (idling mode) and then switch off.
- Too low machine usage.
| Maintenance intervals
M 44 - M 480* |
Service kit
A 500 h / every year |
Service kit
B 1,000 h / 2 years |
Service kit
C 1,500 h / 3 years |
Service kit
D 3,000 h / 6 years |
| Engine filter SET | x | x | x | x |
| Engine oil | x | x | x | x |
| Compressed air treatment (optional) | x | x | x | x |
| Filter SET (includes Engine Filter SET) | x | x | ||
| Compressor oil | x | x | ||
| Dirt trap | x | x | ||
| Oil separator cartridge | x | x | ||
| AdBlue filter (optional) | x | x | ||
| Antifreeze | x | x | ||
| Engine belt | x | x |